 Provo
Provo Replacing Insulation After a Mouse Infestation
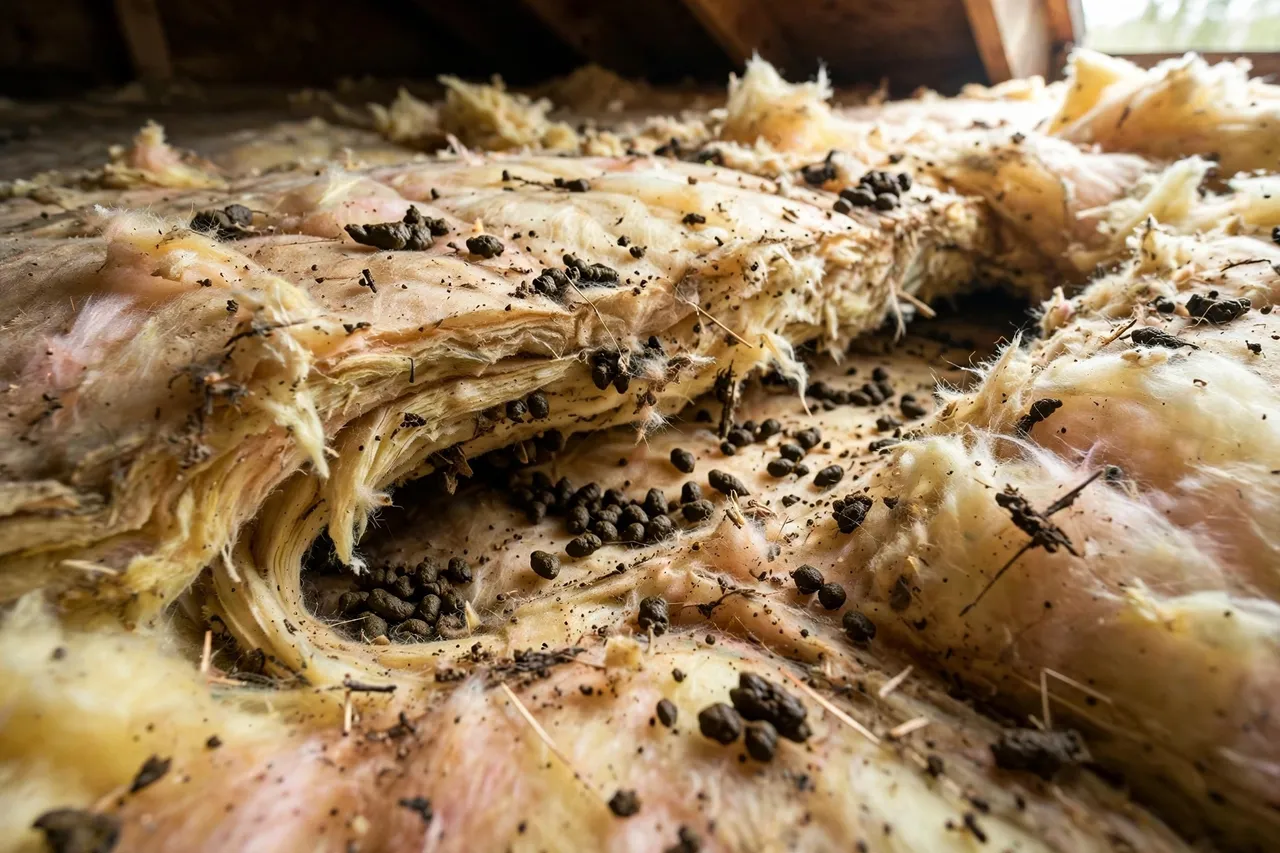
It usually starts with a trip into the attic for a storage bin. Then you see them: dark tunnels pressed into the blown-in insulation, droppings scattered along the runs, a nest tucked against a joist. The question every Provo homeowner asks at that moment is the same — can this be cleaned, or does it all have to come out? Honest answer: sometimes a small, fresh problem can be spot-treated, but an established infestation changes the insulation itself, and at that point replacement is the only fix that actually solves it.
Signs the Insulation Is Contaminated
Look for droppings distributed through the insulation rather than just a few pellets on top, visible tunnels and compressed runs where mice travel, nesting pockets of shredded material — often lined with whatever soft debris was available — and a persistent sour, ammonia-like odor when the attic warms up. Urine staining works down through blown-in material and soaks batts from above, so damage is almost always deeper than the surface suggests. If mice have been active for a full season or more, assume the contamination is through the depth of the material in the affected areas, not sitting on top of it.
Why Cleaning in Place Usually Fails
Insulation is a filter as much as a blanket. Droppings, urine, dander, and nesting debris work down into it and stay there. Vacuuming the surface removes what you can see and stirs the rest into the attic air — the opposite of what you want where deer mice are concerned, since disturbing dried contamination is exactly how particles become airborne. Spraying disinfectant on top doesn't reach the depth of the material either. And none of it restores the insulation itself: matted, tunneled, compressed insulation has lost the air pockets that give it insulating value. You'd be paying to sanitize a product that no longer does its job.
The Right Order of Operations
Sequence matters more than any single step:
1. Remove the rodents. Trapping and removal first — there's no point cleaning an attic that's still occupied.
2. Remove the contaminated insulation. The affected material comes out with proper protective equipment and containment, so contamination isn't dragged through the house.
3. Clean and disinfect the attic surfaces. With the insulation out, the deck, joists, and top plates can actually be reached, cleaned, and treated.
4. Seal every entry point. While the attic is open and visible, the roofline gaps, vent penetrations, and top-plate openings the mice used are closed — this is the step that protects the investment, and it's the heart of our attic insulation removal and replacement process.
5. Install new insulation last. Only after removal, cleaning, and sealing does fresh insulation go in.
Reversing the order — insulating first, or sealing while mice are still inside — produces the two classic failures: new insulation nested in within weeks, or mice trapped in the house looking for a new way out through your walls.
The Energy Angle: Utah Winters Are Not Forgiving
There's a second cost to ruined attic insulation beyond contamination. Compressed and tunneled material insulates poorly, and in a Provo winter — with January nights well below freezing — a compromised attic shows up as uneven room temperatures, a furnace that runs longer, and higher heating bills. Homeowners sometimes chase those symptoms with HVAC service calls when the real problem is overhead. A properly restored attic, with full-depth insulation over a sealed ceiling plane, fixes the contamination and the heat loss in the same project. If you're already weighing an insulation upgrade for energy reasons, an infestation history is a strong argument for doing the full remove-clean-seal-insulate sequence rather than simply blowing more material over the top — adding fresh insulation over contaminated material buries the problem instead of ending it.
Not every attic needs a full replacement; a recent, limited problem caught early may only need a section addressed. The honest way to know is an inspection that maps where the activity actually is, which is where our attic rodent control work starts. But where contamination is deep and widespread, replacement done in the right order is the fix that lasts.
Frequently Asked Questions
Can mouse-contaminated insulation be cleaned instead of replaced?
Light surface contamination in a small area sometimes can be addressed, but once droppings and urine are worked through the depth of the insulation and tunnels and nests run through it, cleaning in place doesn't remove the contamination — it just disturbs it. Removal and replacement is the reliable fix at that point.
Does contaminated insulation affect my heating bills?
Yes. Mice compress and tunnel through insulation, and matted, soiled batts or blown-in material lose insulating value. In a Utah winter that shows up as colder rooms and higher heating costs, on top of the contamination problem.
What is the correct order for fixing a contaminated attic?
Remove the rodents first, then remove the contaminated insulation, clean and disinfect the attic surfaces, seal every entry point, and only then install new insulation. Insulating before sealing and removal just gives the next mice fresh material to nest in.
Keep Reading
Keep Mice Out of the Attic Before Winter
Prevention for next season, before the cold drives mice up.
Read →Attic Insulation Full of Tunnels and Droppings?
We remove the rodents and the ruined insulation, clean and seal the attic, and reinsulate — in the right order.
Call (385) 406-1774